But to save you all the pain of learning how to use Flash software (it weren't easy believe me!) I found you all a much simpler way to do the whole thang, thanks to the lovely Jaymi over at Live, Love, Travel sharing some tips with me.
Making the Collage Photos
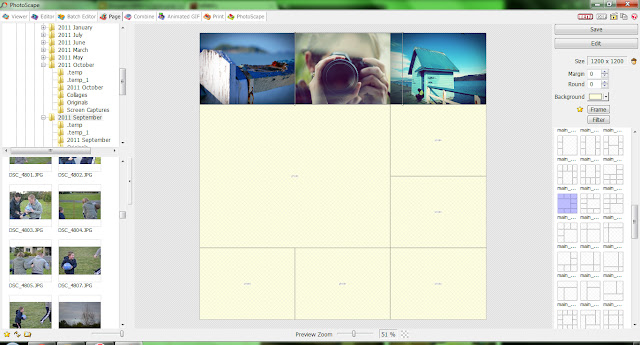
First take your pics and turn them into a few similar sized collages in your photo software application. I used Photoscape to create a collage that was 3 photos wide, and then cropped all the individual collage pictures to 1200 x 300 (although you may want to try 1024 for a slightly less wide look).
Upload to a photo hosting site
Take the total number of collages you want to use for the slideshow (I used four) and then upload these to Photobucket.
Creating the code for the revolving header
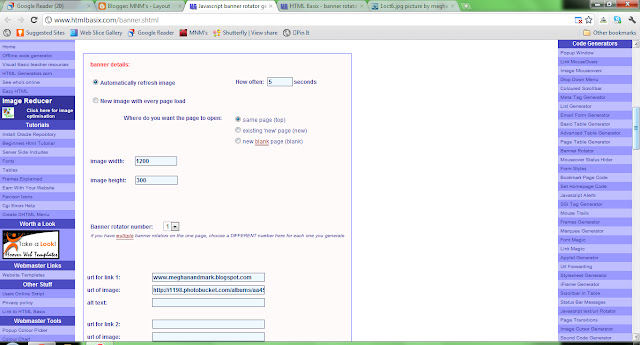
Whilst keeping your Photobucket page open, open a new web page at http://www.htmlbasix.
Change the settings for how often you want the image to change (default is 10 seconds).
Under URL for link 1 enter your blog's homepage address.
Go back to the open Photobucket tab, click into each of the individual photos you have uploaded, and copy the 'Direct link' code line into the 'URL of image' lines of the HTMLbasix page.
Once you have a direct link copied for each photo you want to use, then click on Generate at the bottom of the HTMLBasix page.
Adding the HTML to your blog
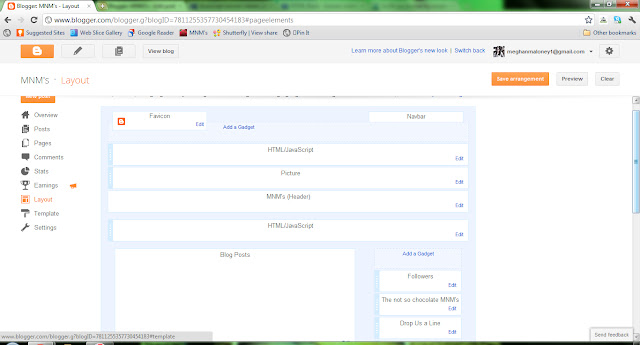
You will then have a whole bunch of gobbledygook ready to put into your blog. Keep this page open and open your blog and go to your Design/Layout page.
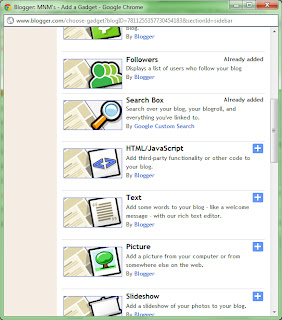
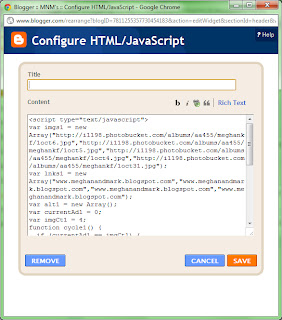
Click on Add a Gadget and select the HTML/Javascript widget.
Go back to the HTMLBasix code generated and copy this into the gadget and Save.
Go back to the layout and move the gadget to the top of the page above the mandatory Header gadget. You may not wish to keep the text/picture of your existing Header as well as the new slideshow, so make sure you go into the Header gadget and delete all info from this gadget if so.
Now preview your blog, and hopefully you will be able to sigh in happiness at how gorgeous it looks and pat yourself on the back for a job well done!







0 comments: